How to send emails using API in Flask-Mail
What is Flask?
Flask is a Python micro web framework. Flask is “micro” because it omits native tools and libraries for an “only installs what you need” approach.
The Flask-Mail extension
In this shot, we’ll look at Flask-Mail. The Flask-Mail extension provides a simple interface to set up
Configuring Flask-Mail
-
MAIL_SERVER: Name/IP Internet Protocol -
MAIL_PORT: Port number of the particular server used. -
MAIL_USERNAME: Username of the sender. -
MAIL_PASSWORD: The password of the sender. -
MAIL_USE_TLS: Enable/disable Transport Security Layer encryption. -
MAIL_USE_SSL: Enable/disable Secure Sockets Layer encryption.
Install the dependencies
First, run the following commands to install the required dependencies:
pip install pipenv
pipenv shell
pipenv install Flask
pipenv install Flask-Mail
pipis a package manager for Python.pipenvis a virtual environment in a Python file.
Code
The app.py class file
This file is created to help the user include any application configuration for the Flask app.
from flask import Flask, request, render_templatefrom flask_mail import Mail, Messageapp = Flask(__name__)# configuration of mailapp.config['MAIL_SERVER']='smtp.gmail.com'app.config['MAIL_PORT'] = 587app.config['MAIL_USERNAME'] = 'yourmail'# use the app password createdapp.config['MAIL_PASSWORD'] = 'yourpassword'app.config['MAIL_USE_TLS'] = Trueapp.config['MAIL_USE_SSL'] = False# instantiating the mail service only after the 'app.config' to avoid errormail = Mail(app)@app.route("/", methods=['GET', 'POST'])def home():# try and except method#to avoid the app crashing if the message does not go through due to network or somethingtry:# if it is a post requestif request.method == 'POST':#getting the html inputs and referencing themsender = request.form['sender']recipient = request.form['recipient']message = request.form['message']subject = request.form['title']# inputing the message in the correct ordermsg = Message(subject,sender=sender,recipients =[recipient] )msg.body = messagemail.send(msg)return "message Sent"return render_template('mail.html')except Exception as e:return f'<p>{e} </p>'if __name__ == '__main__':# for app to run and debug to Trueapp.run(debug = True)
The mail.html file
Create a folder and name it templates. Then, inside the templates folder, create a file and name it mail.html.
Inside mail.html, do this:
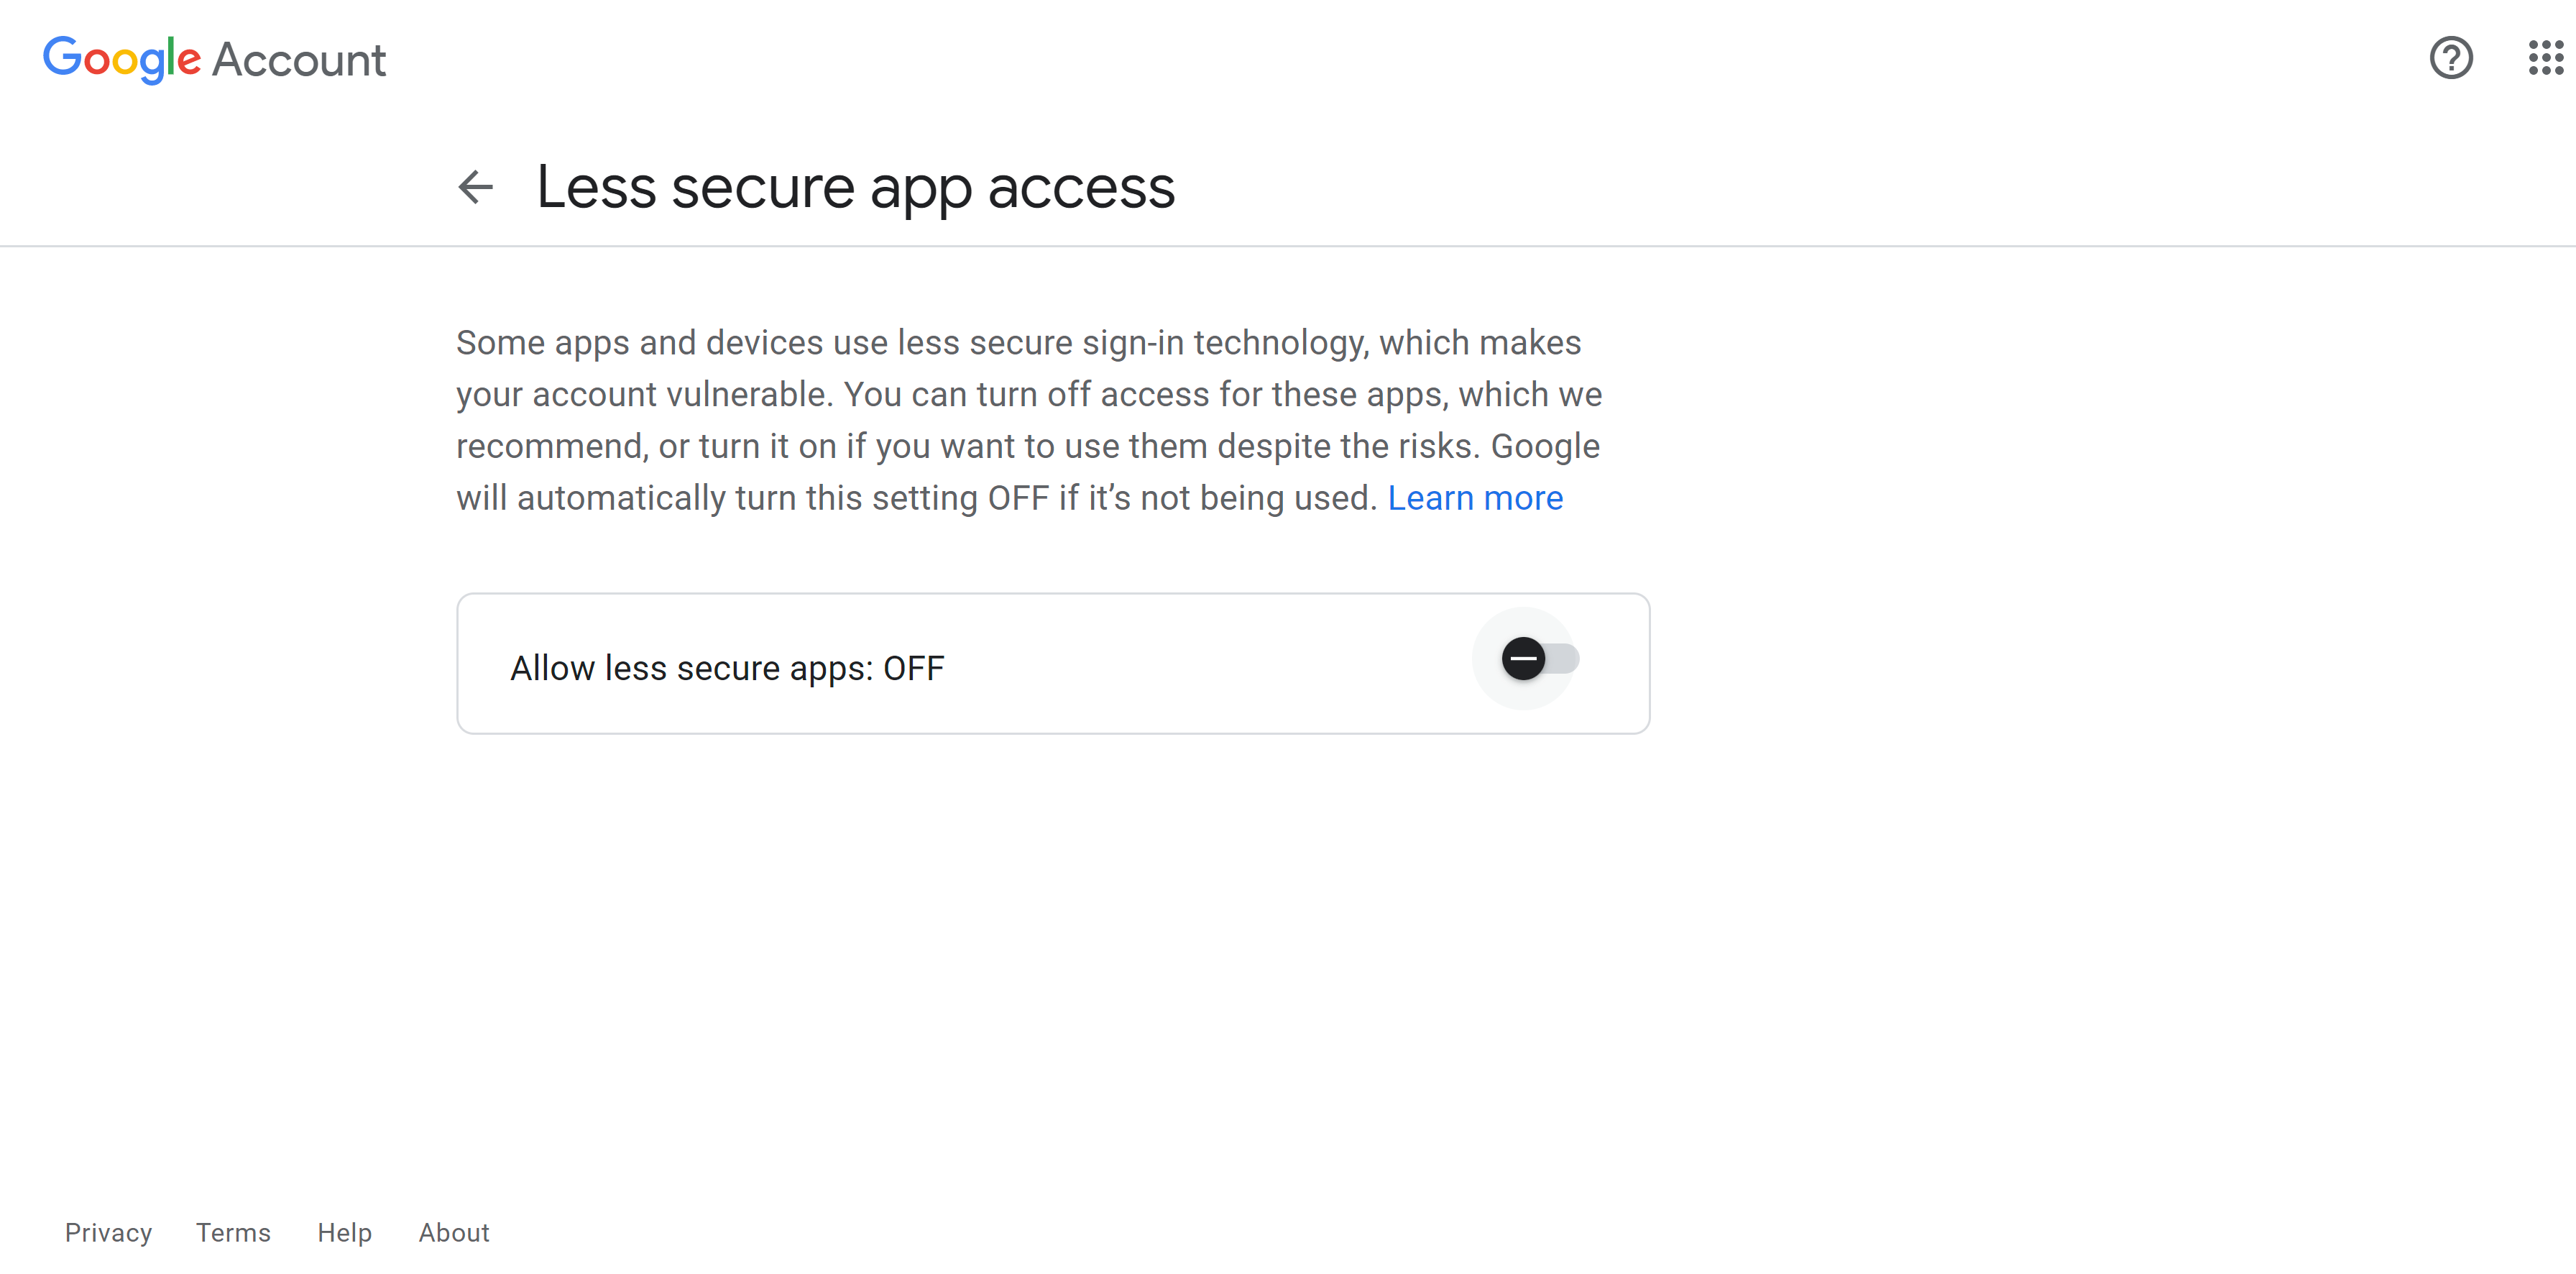
Visit https://myaccount.google.com/lesssecureapps?pli=1 to decrease the security of your mailbox. You have to create your web key as the password so it can allow less secure apps.
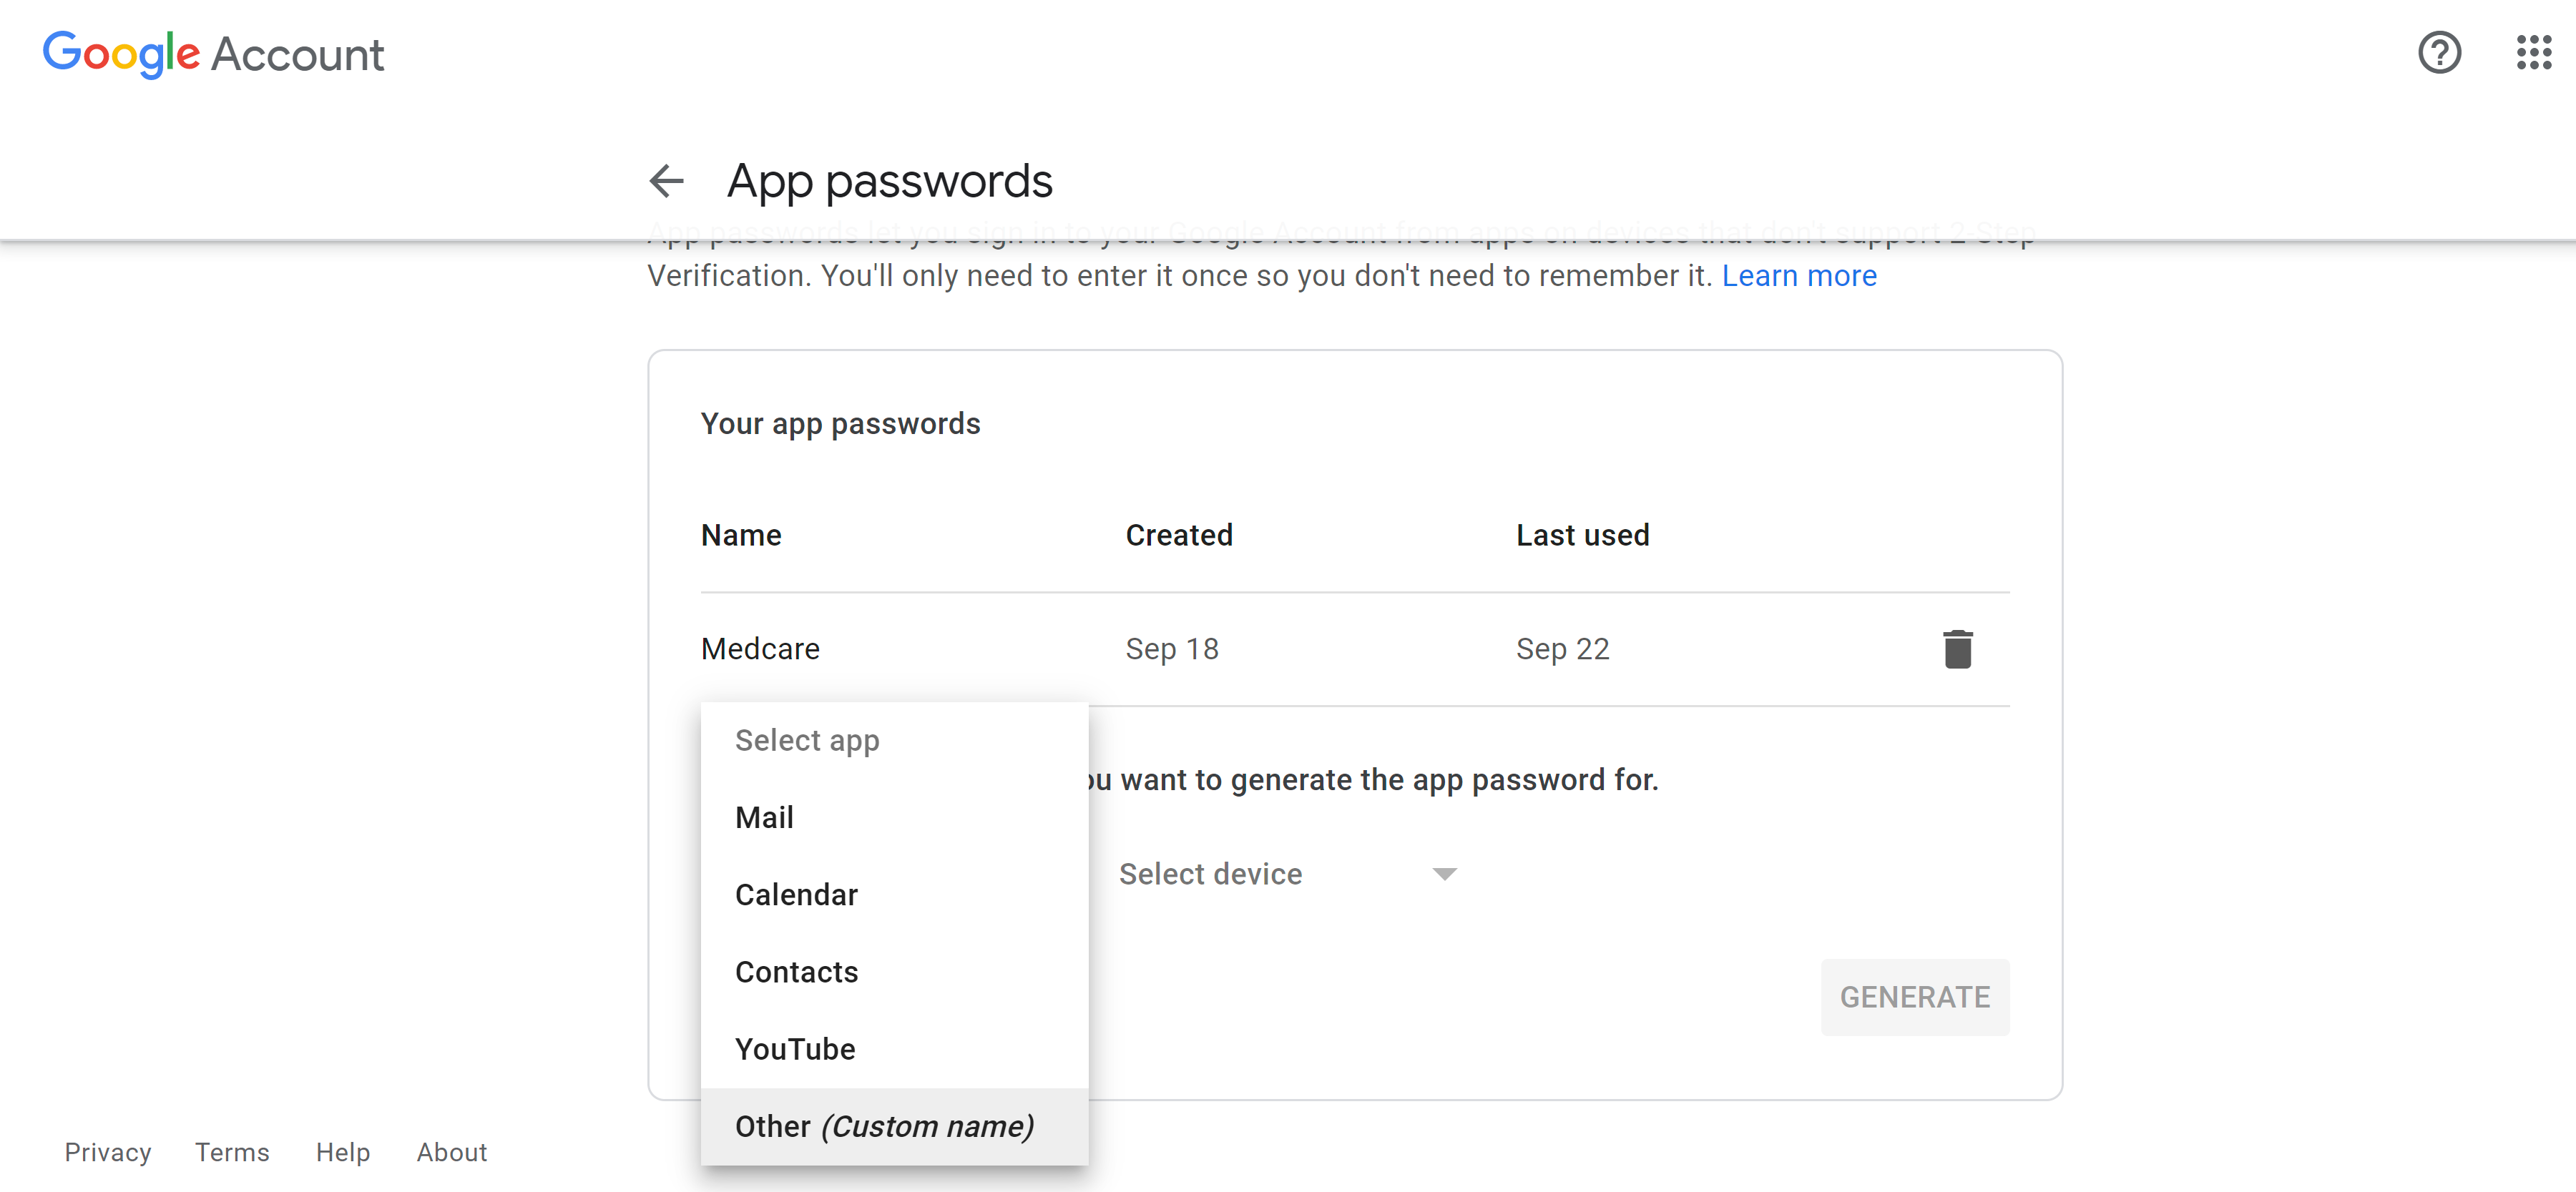
Here are some screenshots for how to get an app password from your Gmail.
Click on “Allow less secure apps”:
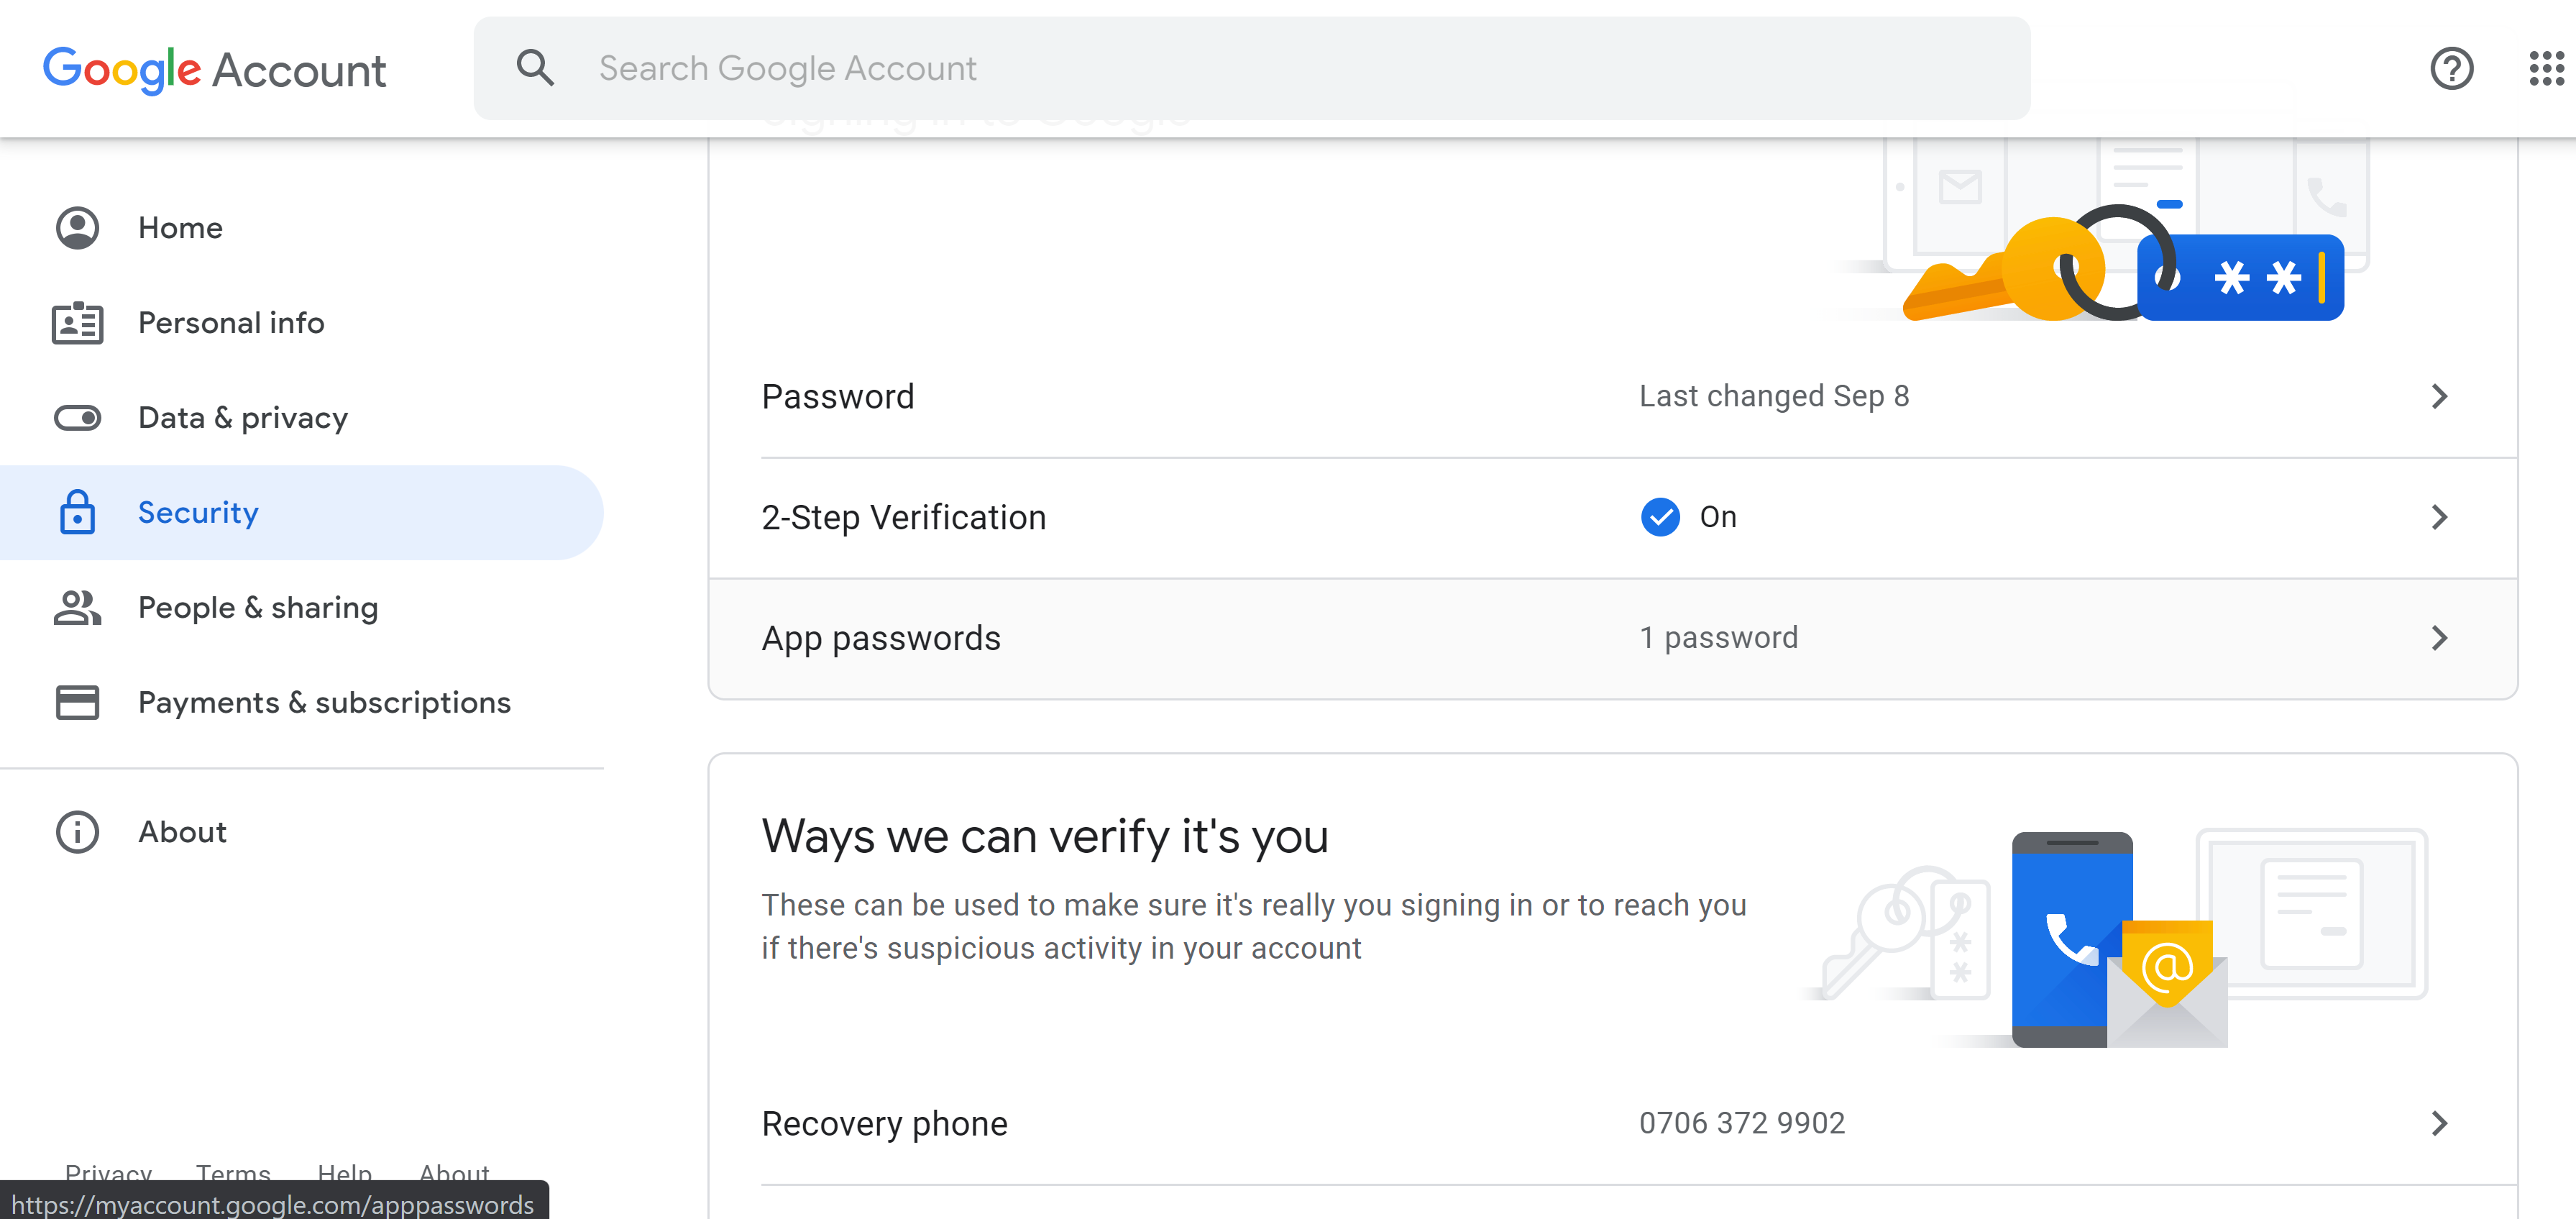
Go to the Gmail dashboard, click “Security” and then “App passwords”:
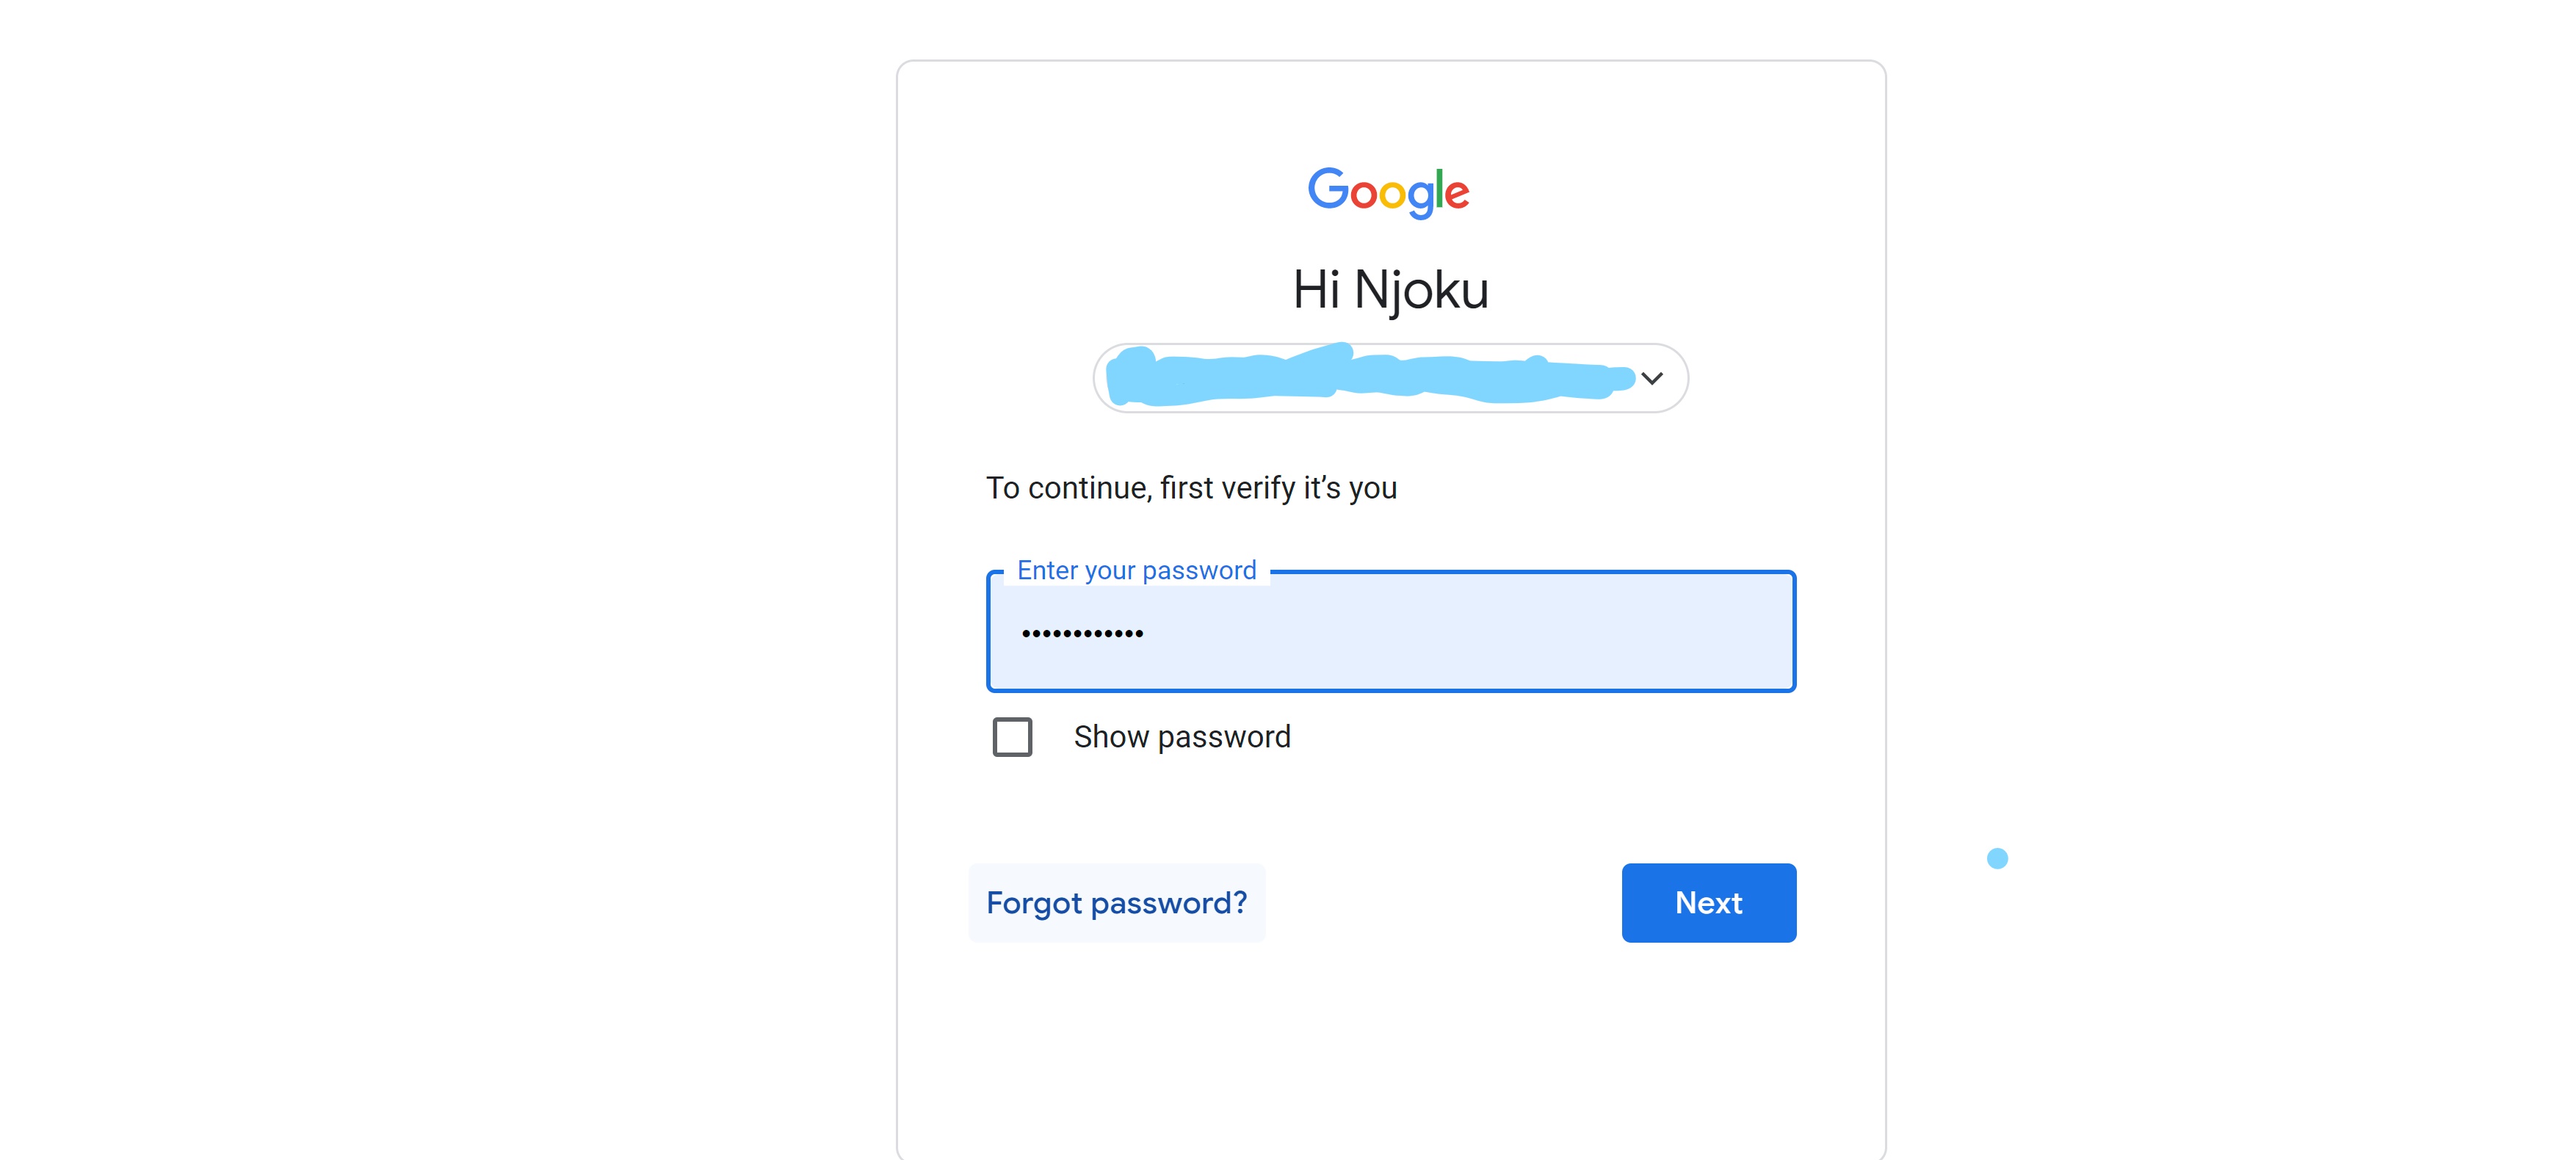
You will be prompted to input your password, so input it:
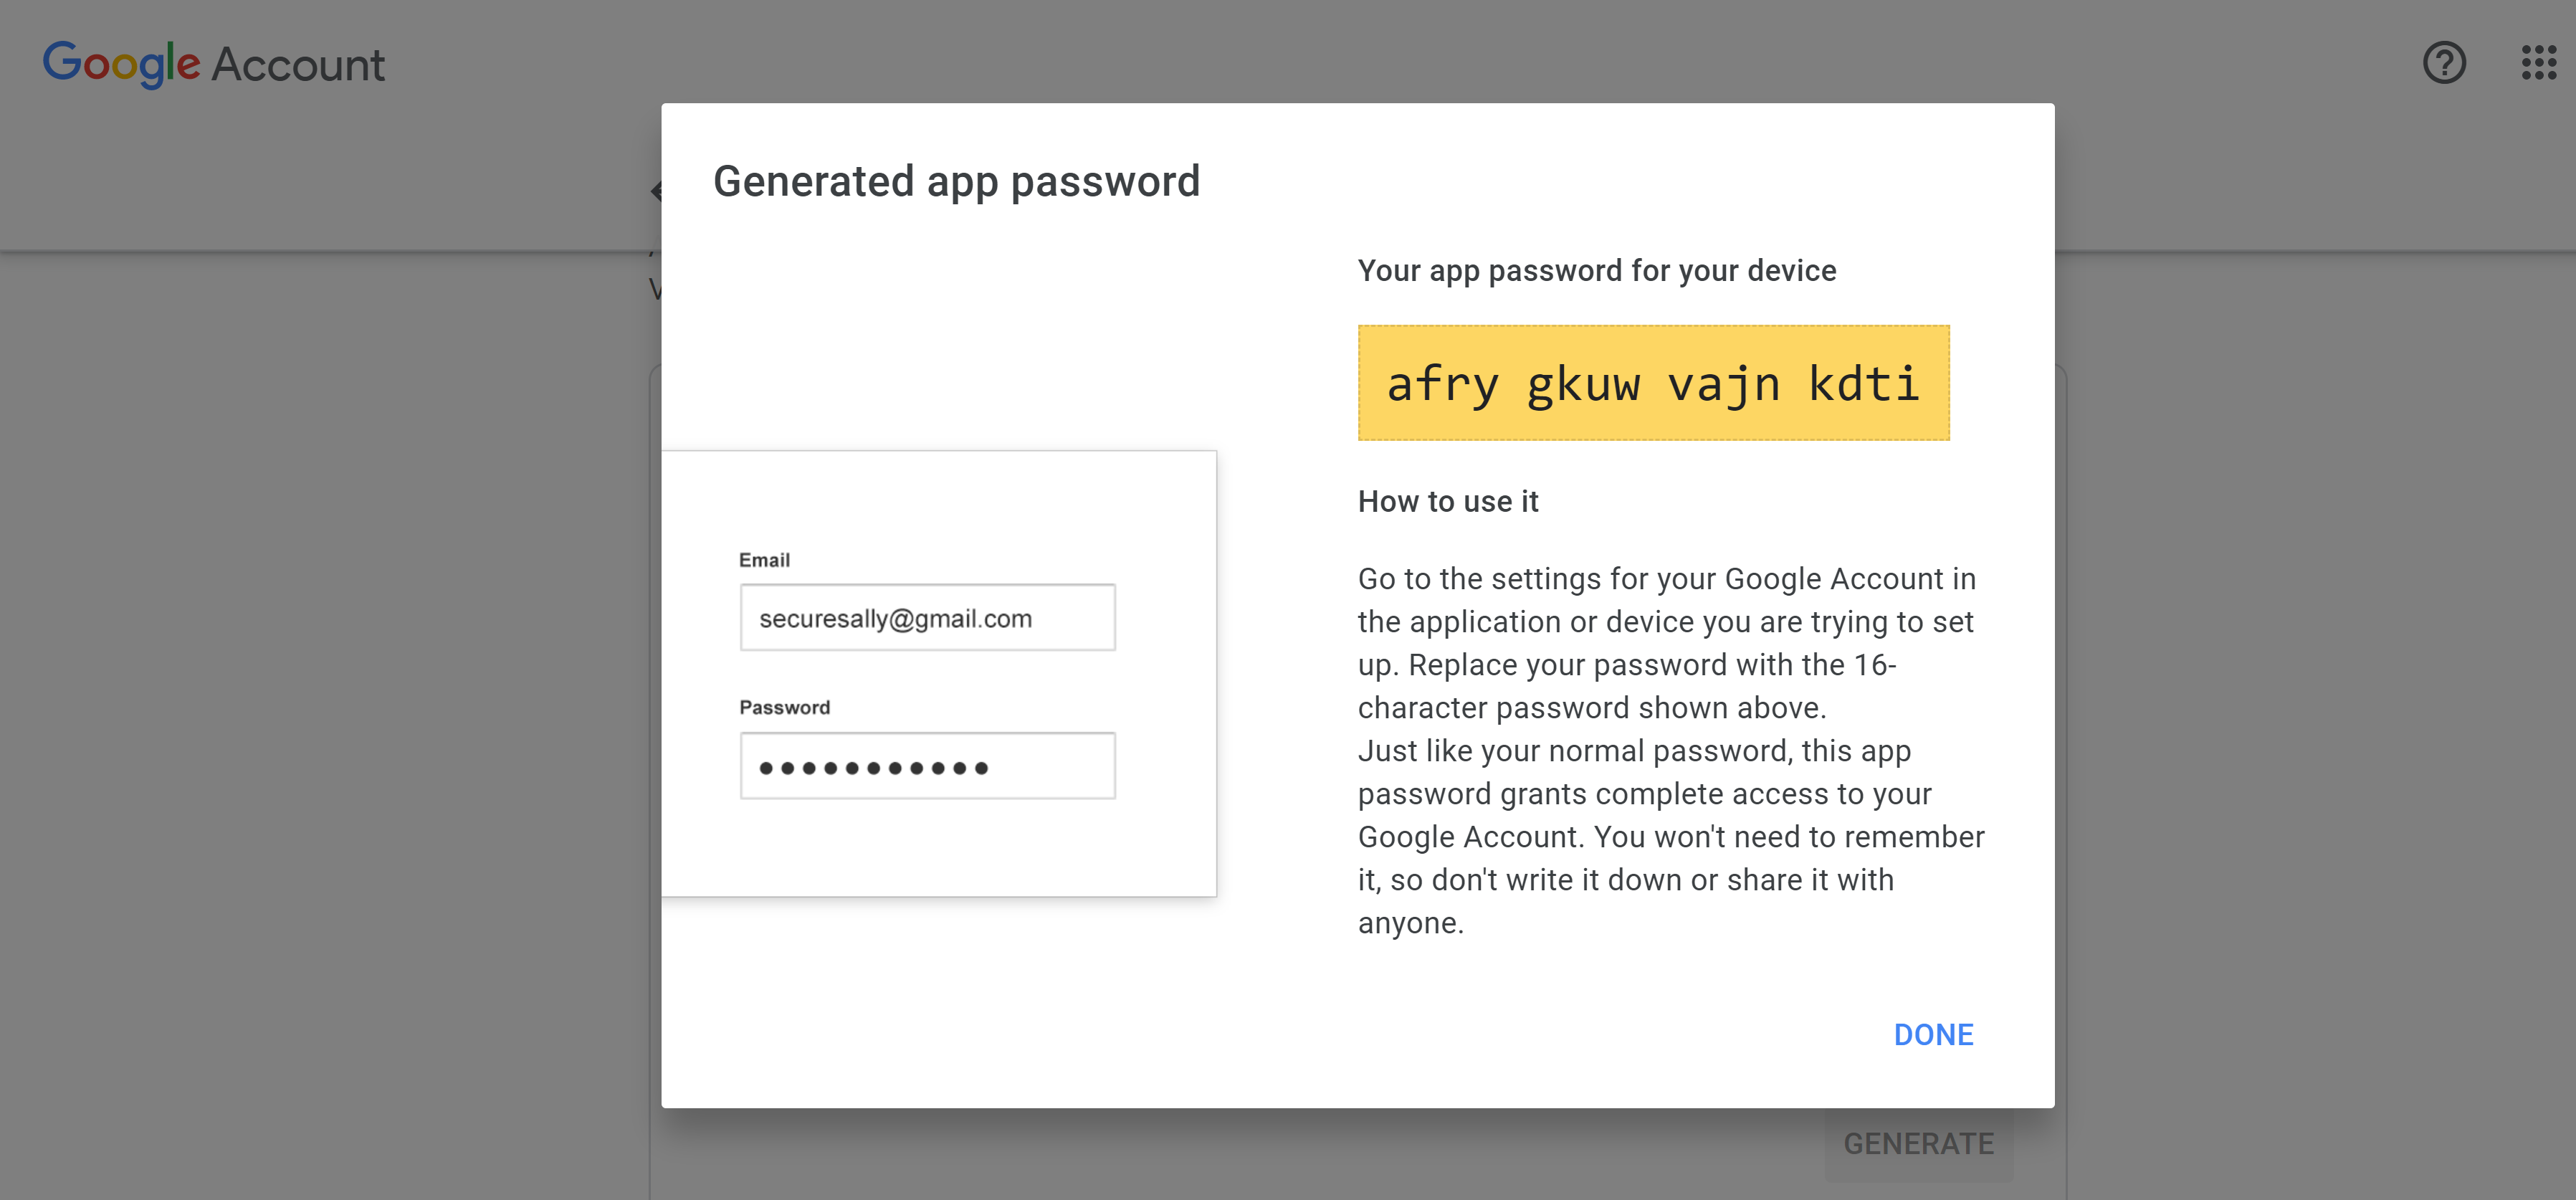
You will see a question asking if you want to generate an app password. Click on “Others” to generate an App password and click “Generate”:
Copy the generated app password, because that will be the password for the Flask-Mail app.