How to allow all incoming connections to a server on VirtualBox
Networking in VirtualBox is extremely powerful, but it is often difficult to ascertain the exact configuration for the networking modes you need.
Although VirtualBox provides several network modes, none of them allow all incoming connections by default. To enable your
The following steps are needed to allow all incoming connections:
- Create the VM through VirtualBox.
- Adjust network settings to allow port forwarding.
- Add port forwarding rules.
Create the VM
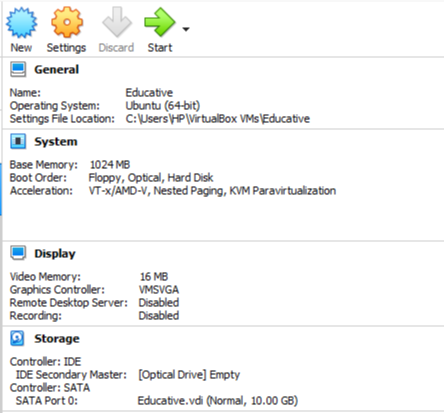
The VM is created with Ubuntu (-bit) as the operating system and a base memory of MB, for this tutorial. The complete specifications are shown below:
Note: You can use different hardware specifications for the VM, as a particular configuration is unnecessary for this walkthrough.
Network settings
Under the Settings tab for your VM, choose the Network option. VirtualBox sets the default network mode as
The illustration below shows how NAT works with VirtualBox:
The issue with the NAT configuration mode is that it is not suitable when the VM needs to act as a server. Although NAT allows the VM to send traffic out to the internet, the incoming connections are not routed back to it.
Port forwarding
To allow external machines to connect to the VM, you will need to use the Port Forwarding option, as shown below:
The final step is to add a port forwarding rule that allows all incoming traffic to your VM. You can allow all incoming connections through the following rule:
The above rule informs VirtualBox that any external
Similarly, you can use different combinations for port numbers to create other rules for incoming connections.
Free Resources
