Creating an Android Studio emulator
Android application developers need a platform where they can test and debug their application. This platform can be in the form of a physical Android device or an Android emulator.
Android Studio provides a built-in default emulator for testing and debugging purposes.

Pre-requisites
-
Install Android Studio 3.0+
-
Android Debug Bridge (
adb)
Setting up the emulator
1. Installing Build-Tools
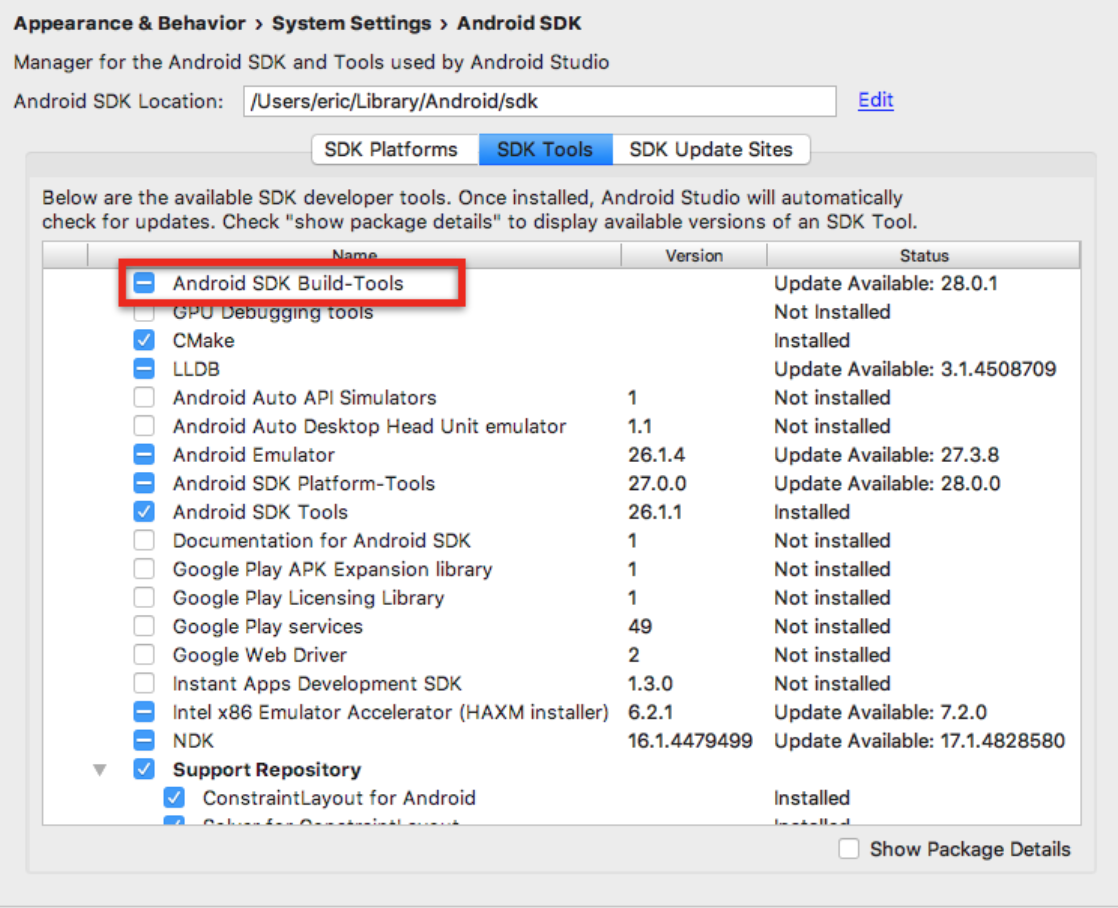
Open Android Studio and navigate to Preferences -> Appearance & Behavior -> System Settings -> Android SDK. Click on the SDK Tools tab and install one version of the Android SDK Build-Tools, if necessary.
2. Set configuration path
Linux or macOS users need to add the Android SDK Location path (see the image above) to PATH by appending the following line in ~./bash_profile:
export ANDROID_SDK=ADD_SDK_LOCATION_PATH_HERE
macOS users need to additionally add platform-tools to ~./bash_profile. This can be done by adding the following line:
export ANDROID_SDK=ADD_SDK_LOCATION_PATH_HERE/platform-tools:$PATH
3. Configuring Virtual Emulator
Navigate to Configure -> AVD Manager in the Android Studio. Click on the Create Virtual Device option and select the relevant device emulator and the OS version to be installed on that emulator. Tweak the settings as required before clicking Finish. The virtual emulator will be created and can be used anytime by clicking on the play icon in the AVD Manager Window.
Free Resources